How to Print an Image on Multiple Pages (Windows, Mac, Online)
By the UtilityNest team · · 7 min read
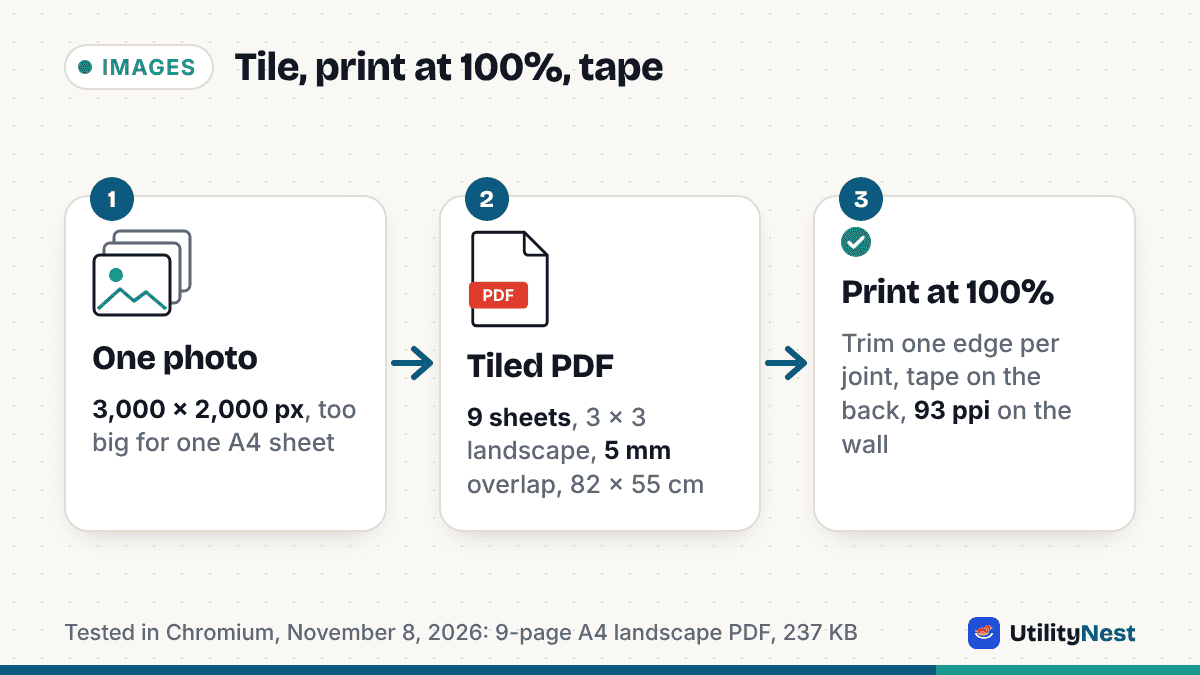
A 3,000 by 2,000 pixel photo on an A4 printer gives you a print 29.7 cm wide at most. Spread the same photo over two A4 sheets side by side and it becomes 37.5 by 25 cm; over 9 sheets, 82 by 55 cm. The method is the same on every platform: something has to cut the picture into page-sized tiles, you print every tile at 100%, and you tape the sheets together. What differs is which program does the cutting. This guide covers the built-in routes on Windows and Mac, the printer-driver route, the PDF route, and a browser route, with the numbers from a real test file.
First decide how big the poster should be
Tiling does not add detail. A photo spread over 9 A4 sheets has the same pixels as the single-sheet print, so each one is bigger. The useful measure is pixels per inch of the finished poster: your image width in pixels divided by the poster width in inches. In our test, the 3,000 pixel wide photo gave 203 pixels per inch at 2 sheets, 93 pixels per inch at 9 sheets (3 landscape A4 across) and 71 pixels per inch at 16 sheets. Around 100 pixels per inch looks fine on a wall seen from a meter away; below 70 the photo turns soft up close. Posters hanging in a kids' room or above a shop counter rarely need more than that. If you want a 1 meter wide poster to look sharp from arm's length, start with an image of at least 4,000 pixels wide.
| Sheets (A4) | Layout | Finished size | Detail from a 3,000 px wide photo |
|---|---|---|---|
| 2 | 2 across, portrait, 5 mm overlap | 37.5 × 25.0 cm | 203 pixels per inch |
| 9 | 3 across, landscape, 5 mm overlap | 82.1 × 54.7 cm | 93 pixels per inch |
| 16 | 4 across, landscape, 10 mm overlap | 107.8 × 71.9 cm | 71 pixels per inch |
The finished sizes come from the printable area of each sheet (a 10 mm margin all round) minus the overlap, which is why 2 A4 sheets give 37.5 cm and not 42 cm. The same picture on US Letter comes out at 38.7 by 25.8 cm on 2 sheets.
Windows: Paint, or the printer driver
Paint can scale a print across pages from File > Print > Page setup. The Scaling section has Adjust to, a percentage of normal size; above 100% the image runs over onto more pages. A Microsoft moderator's answer from March 2026 describes the same dialog and warns that a recent Paint update changed how print scaling behaves, with some readers reporting a 6-page print spilling onto nearly 40, so check the print preview before you commit paper and ink. There is no overlap and there are no cut marks: each page holds exactly its share of the picture, so you trim the margins and butt the edges together. For a print that will be looked at closely, that seam shows.
The better Windows route is often your printer's own driver. Canon's Windows driver, for example, has a Page Layout setting on the Page Setup tab with Poster (1 x 2) through Poster (4 x 4), plus an option to print Cut/Paste lines in the margins and to reprint only the pages you choose. Epson, HP and Brother drivers have similar poster or tiling modes under different names; look in the layout or finishing tab of the printer properties, since it is not in the Windows print dialog itself. The driver route works from any program, including Photos and Word, because the splitting happens after the program hands the page to the printer. Its weakness is that you cannot set the overlap in millimeters or see the finished size in centimeters before printing.
Mac: Preview cannot tile, so make a PDF first
Preview's print sheet has Scale as a percentage, Scale to Fit with Print Entire Image or Fill Entire Paper, and Copies per page. None of these splits one image across several sheets; Apple's guide to printing in Preview does not list a tiling option (checked on November 8, 2026). Setting Scale to 300% just prints the middle of the picture on one sheet. The macOS route is therefore two steps: turn the image into a multi-page PDF where each page is one tile, then print that PDF at 100% from Preview. Either of the next two sections makes that PDF.
Any PDF reader with a Poster option
If your image is already inside a PDF, or you can save it as one (Print to PDF on Windows, Save as PDF in the Mac print sheet), Adobe Acrobat and the free Reader print it tiled. In the Print dialog, choose Poster under Page Sizing & Handling, then set Tile Scale (the enlargement percentage), Overlap, Cut marks and Labels, which add the file name and page number to each tile. The preview updates as you change the scale so you can watch the page count. This is a good route when the artwork is a flyer or a sign laid out in a PDF, because text stays sharp as vectors at any tile scale. For a photo it is one extra conversion step compared with tiling the image directly.
In the browser: a tiled PDF from the image itself
Our Print Image on Multiple Pages tool takes a JPG, PNG, WebP or BMP and produces a PDF with one tile per page. You pick A4 or US Letter, portrait or landscape, how many sheets across (1 to 8), and an overlap of 0, 5 or 10 mm. The number of rows follows from the picture's shape, and the panel shows the sheet count, the finished size in centimeters and the pixels per inch before you download anything. Trim marks and a label on each sheet (row, column and a reminder to print at 100%) are on by default and can be turned off. The image is processed on your device and never uploaded; the limits are 25 MB, 25 megapixels, 8,192 pixels on either side and 36 sheets.
In our test, the 3,000 by 2,000 pixel photo at the default setting (A4 portrait, 2 across, 5 mm overlap) produced a 2-page PDF; at 3 across in landscape it produced 9 pages of 841.9 by 595.3 points, which is exactly A4 landscape, in a 237 KB file. The trim marks and labels sit at least 5.5 mm from the paper edge so that home printers with a 5 mm unprintable border still print them. The result is a normal PDF, so the last step is the same on Windows, Mac and a phone: open it and print.
Printing and taping the sheets
Whichever route made the pages, the print dialog must be set to 100%, Actual size or Scale 100, not Fit to page or Shrink to fit. Fit to page shrinks each tile by a few percent to clear the printer's margins, and a few percent on every sheet adds up to a poster that no longer lines up. Print one sheet first and check that the trim marks are 10 mm from the paper edge; if they are, the rest will match.
With a 5 mm overlap, cut only one edge of each joint: trim the right margin off the left-hand sheet along its trim mark, lay it over the uncut neighbor so the picture lines up, and tape it on the back. Leaving the other sheet uncut hides small cutting errors under the overlap. A glue stick works for a poster that will be framed; tape is easier to reposition. Zero overlap is for cutting on a board with a ruler where you trust the cut; 10 mm is for thick paper or a long banner where the sheets may wander.
Photo paper, matte paper and plain copy paper have different printable margins. Keep the whole poster on one paper type, loaded the same way, or the tiles will not meet.
Sources
- Apple: Print PDFs and images in Preview on Mac (Scale, Scale to Fit, Print Entire Image, Fill Entire Paper, Copies per page)
- Adobe: Print large-sized documents (Poster under Page Sizing & Handling, Tile Scale, Overlap, Cut marks, Labels)
- Canon: Tiling/Poster Printing (Windows printer driver, Poster (1 x 2) to Poster (4 x 4), Cut/Paste lines)
- Microsoft Q&A: Issues with Paint double the size of my print image (Paint Page setup, Scaling, Adjust to; moderator answer dated March 8, 2026)