SVG vs. PNG for Logos: Which File Should You Use?
By the UtilityNest team · · 4 min read
Use SVG as the master for a logo made of shapes, lines or type. You can render it at different sizes without starting with a fixed pixel grid. Use PNG when a platform asks for a regular image upload or when a design needs a transparent raster copy. If you need both, keep the SVG and export the PNG at the dimensions the destination requires.
What changes when you enlarge the file
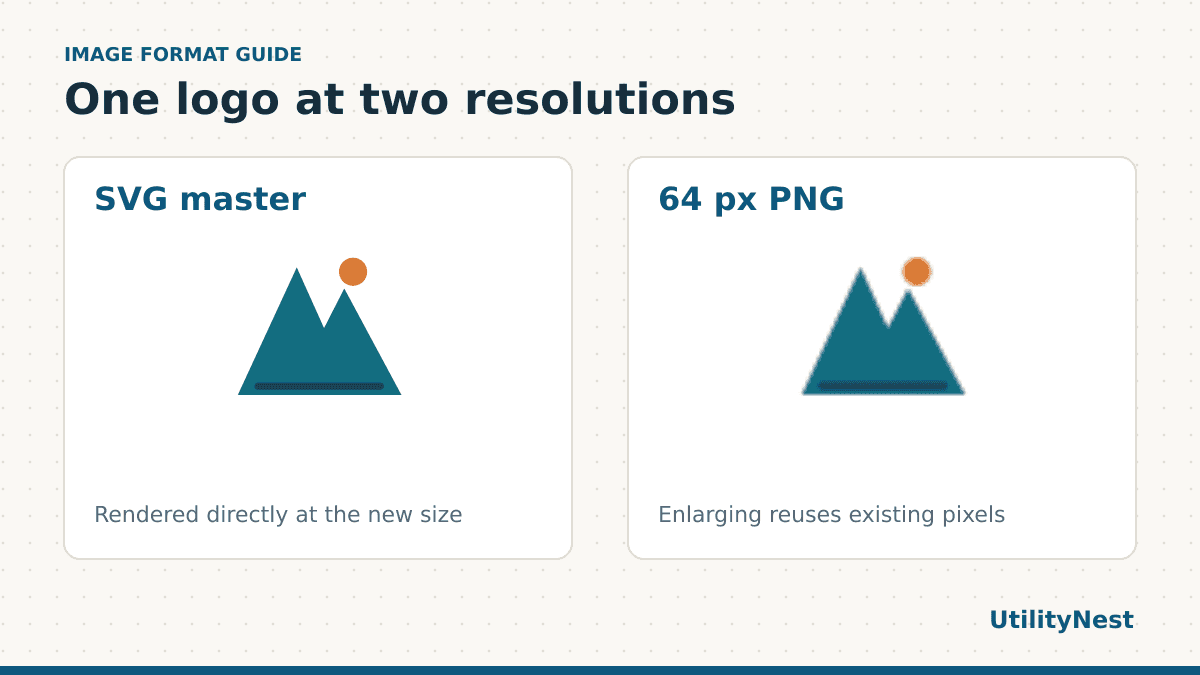
An SVG can describe a line with coordinates and a color. The viewer draws that line for the space it is given. A PNG stores a grid of pixels. Enlarging a small PNG means estimating additional pixels between the ones already there. On a logo, that difference shows up most at diagonal edges, thin letters and corners.
| Where the logo is going | Which copy to start with | What to check |
|---|---|---|
| A website or an editable layout | SVG, if accepted | Fonts, colors and spacing at the final display size |
| A form that requests PNG | PNG exported from the SVG | Exact dimensions, file size and the visible background |
| A logo someone sent as a small PNG | Ask for the original vector artwork | Check whether edges and tiny lettering are already blurry |
Compare a real vector with its 64-pixel export
Download the original SVG mark and the 64 × 64 PNG. Both contain the same simple mountain design with transparent corners. We rendered the SVG at 512 × 512, then separately enlarged the 64-pixel PNG to the same dimensions. In the enlarged PNG, the diagonal edges were visibly softer. In the SVG render, those edges were drawn directly at the new size.


The comparison is easiest to see on a large display or zoomed into the same area of both files. It does not mean a PNG is unsuitable for a small icon. The 64-pixel copy is useful where 64 pixels is the intended size. For a site header or a large sign, go back to the vector master rather than enlarging an export made for a thumbnail.
Export a PNG that fits the destination
- Find the actual upload dimensions and background requirements. Check whether the size describes the complete image, including padding.
- Open your master in SVG to PNG. Keep the proportions and export at the required pixel dimensions.
- Open the PNG over a light and a dark background. Check the transparent area, any white lettering and the padding around the logo. Read the file dimensions before uploading it.
- Keep the original vector beside the exported copies. Use a filename that includes the dimensions when you produce more than one PNG.
If your SVG uses type or an embedded image, open it in a second viewer before exporting. An SVG can contain raster art, and an image embedded inside it still has its own pixel limits. Fonts can also look different when the same font is unavailable in another environment. If the creator supplied an outlined or self-contained logo for sharing, use that copy for the export. Keep an editable version for any later text changes.
Allow room for the destination to crop
Some platforms display a square upload inside a circle or cover part of it with a badge. For a centered logo, keep the mark away from the outer edge and use the preview to see how the frame affects it. Export the requested canvas dimensions and give the actual mark enough breathing room inside that canvas. A 512-pixel file can still feel crowded if the mark touches its edges.
Check light and dark backgrounds separately. A logo with dark outlines may be fine on white and almost invisible on black. If you have separate light and dark artwork, export from the correct source for each background. Changing the file format alone will not improve contrast. For an upload system that always adds its own background, preview the result in that system before choosing the transparent copy.
Keep related exports organized with names such as mark-64.png and mark-512.png. When the design changes, regenerate both from the master. This helps keep the padding and shapes consistent across sizes.
When you only have a PNG
Turning the filename into logo.svg will not create editable paths. A tracing tool can follow the edges of simple artwork and produce vector shapes. Try Image to SVG on a clean one-color mark, then compare the curves and holes with the original. Tiny lettering and shaded textures can need manual cleanup. If the logo belongs to a brand with established artwork, ask for an official source file before tracing it.
For a print job, ask the printer which file formats they accept before deciding how to deliver the logo. Some will want a vector PDF. Others can take a raster file prepared at the dimensions they specify. Open the exact file you intend to send and check the smallest lettering at the final size.