Background Remover Gave a Tiny or Messy Cutout? Fixes
By the UtilityNest team · · 6 min read
You removed the background from a photo and the result is the wrong shape for the job: tiny, fuzzy at the edges, black where it should be clear, or a PNG so big that a form refuses it. These problems have different causes, and most have a quick fix once you know which one you have. Below is each problem, why it happens and what to do about it.
The cutout is much smaller than the original photo
The usual cause is the service, not the picture. Some free online cutout sites give free users a reduced "preview" version and charge for the full-size file, so a 4000-pixel photo comes back at a few hundred pixels. Check the pixel size of the result before you build anything on it: right-click the file and open its properties, or open it in any image viewer.
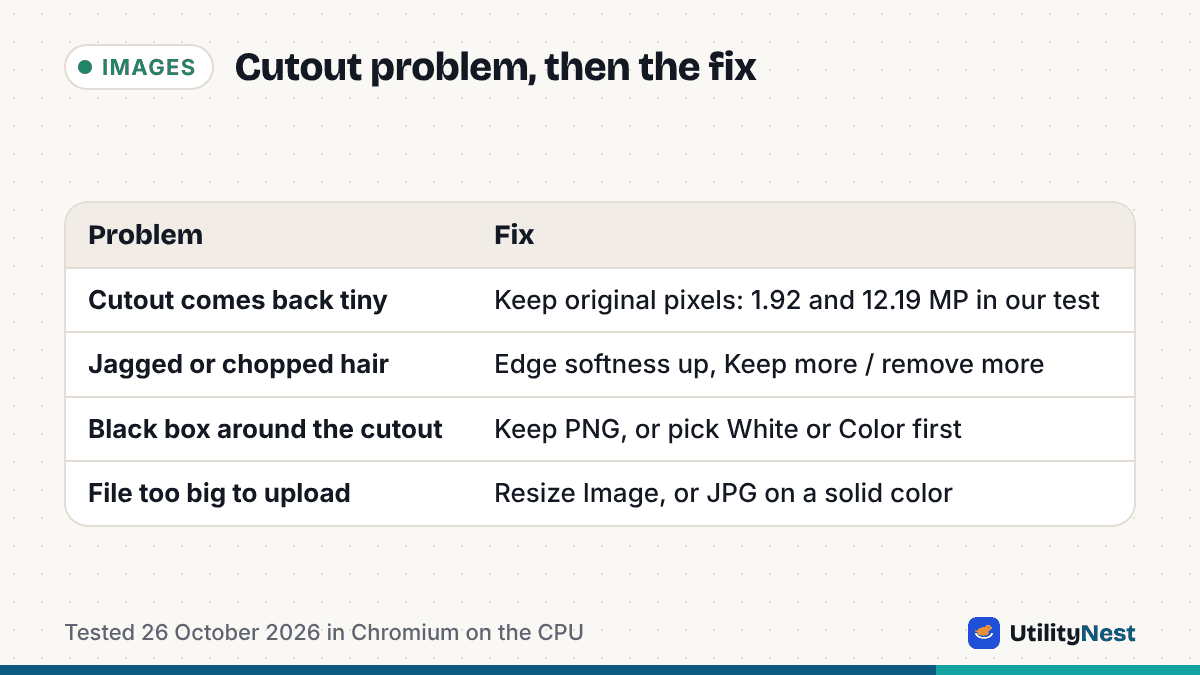
A cutout is only as sharp as the file it started from, so the fix is a tool that keeps the pixels you gave it. Our Remove Background tool saves at the original pixel size. In our test on October 26, 2026, a 1200 x 1600 portrait (about 1.9 megapixels) and a 4032 x 3024 photo (about 12.2 megapixels) both came out as full-resolution transparent PNGs, roughly 21 seconds each on the CPU, including loading the model. The built-in options on Apple devices also work on the full image, as described below.
Hair, fur and fine edges look jagged or chopped
Automatic removal makes a per-pixel guess about what is subject and what is background. Wispy hair against a busy background is the hardest case, because the pixels there are a mix of both. The result is either a hard, scissor-cut outline or leftover background clinging to the strands.
Two things help. First, start from the sharpest, best-lit original you have, because a blurry source gives the model nothing to separate. Second, use the controls your tool gives you. In ours, Edge softness goes lower for crisp logos and products and higher for hair, and the Keep more / remove more slider handles faint leftovers or a subject that lost a thin part. There is no brush for painting one spot back by hand, so if one detail is still wrong after the sliders, a tool with a manual eraser is the better choice for that image.
Solid clothing or objects look a little see-through
This one showed up in our own testing. The model sometimes scored the inside of a large solid area, such as a dark jacket, slightly below fully opaque, so the checkerboard or the new background showed faintly through. We fixed it the same day, and solid subject areas now come out fully opaque in our tool. If you see this with another tool, nudge its remove-more or keep-more control, or add a flat color behind the subject and check whether the fabric still looks washed out.
The transparent areas turn black or white
Transparency only exists in formats that support it. PNG does, WebP does, and JPG does not. When a transparent image is saved or converted to JPG, the clear pixels have to become some color, and many programs fill them with black or white. If your cutout suddenly has a black box around it, it was probably saved as a JPG somewhere along the way. Our guide on why a transparent PNG turns black as JPG covers that conversion in detail.
The fix depends on what you need. If the next app accepts PNG, keep PNG. If it only takes JPG, choose the background color first, so the cutout is flattened onto white or a brand color instead of whatever the converter picks. Our tool does this for you: with a White, Color or Blur background you can pick PNG or a smaller JPG, and a transparent background always saves as PNG.
The file is far too large to upload
A full-resolution PNG with transparency can be several megabytes, because PNG is lossless and a cutout often keeps every detail of a large photo. A product listing or a form with a size limit may refuse it even though the image looks fine.
You have two ways down. Shrink the pixel dimensions with Resize Image, which keeps a PNG as a PNG by default (its default output is Same as original). Or put the subject on a solid background and save as JPG, which is usually much smaller. Cropping away empty space first also helps, and our Crop to subject toggle trims the canvas to the subject for you.
You need a cutout for a design, not a transparent file
Sometimes the real goal is a clean photo on a plain background, such as a white product shot or a profile picture with a solid color behind it. Skip the transparent PNG step and choose White or Color directly. It saves one conversion, avoids the black-box problem above, and gives you one file to upload. A Blur option keeps a softened version of the original background if a flat color looks too stark.
You only have a phone or a Mac
You may not need a website at all. On a Mac, Apple's Preview guide says to open the image and click the Remove Background button in the toolbar. If Preview asks whether to convert the file to PNG, Apple suggests clicking Cancel and choosing File > Duplicate first to keep the original, or Convert to change the file itself. Edit > Undo reverses the removal. Nothing leaves your computer, but there is no setting for edge softness or a replacement background.
On an iPhone, Apple's guide says to open a photo in full screen, touch and hold the subject until an outline appears, and then tap Copy, Add Sticker or Share. It is built for pasting one cutout into a message, note or document, not for batches.
Processing many photos is slow or tedious
One at a time is fine for a profile photo and painful for a product catalog. Our tool takes JPG, PNG, WebP or HEIC, up to 30 images in one go, processes them one after another and offers Download all as a ZIP. It runs in your browser, so nothing is uploaded, there is no account and no watermark. It uses the graphics card through WebGPU when the browser offers it and falls back to the CPU otherwise, which is why the same job can take noticeably longer on an older device. The first run also needs a one-time model download.
A quick way to decide
If you are doing one photo on an Apple device, use the built-in feature. If you need full-size files, several photos at once or a solid background in one step, a browser tool that runs locally is the simplest route. If a single stubborn detail will not come out right and the sliders cannot fix it, use an editor with a manual brush for that image. Whichever you choose, look at the pixel size of the result before you share it, since that is the quickest way to catch a shrunken file.
Sources
- Apple Support: Remove a background or extract an image in Preview on Mac
- Apple Support: Lift a subject from the photo or video background on iPhone
Apple instructions checked on October 26, 2026. Tested with UtilityNest's Remove Background tool in Chromium on the CPU.